This Sunday Tate is being baptized (or as Marlie calls is baptamatized) at our church. We are having family over to our house for a little brunch afterward to celebrate. So you'd think that today I would be cleaning and getting ready for company, but instead I decided to make a bow tie for Tate's outfit because I'm just sort of nuts like that. His outfit needed a little something. I read some blogs on making a baby bow tie from fabric, but I wanted it to be real tie fabric. So I got a tie on clearance at JCPenneys and just kind of hoped I could figure it out. I thought I would be cutting big pieces of fabric out and ironing and sewing, but as I looked at it I realized maybe the easiest thing to do would be to use the skinny tail end of the tie. I took some pictures as I went in case it did turn out cute so I could show you how to do it. So, here we go...
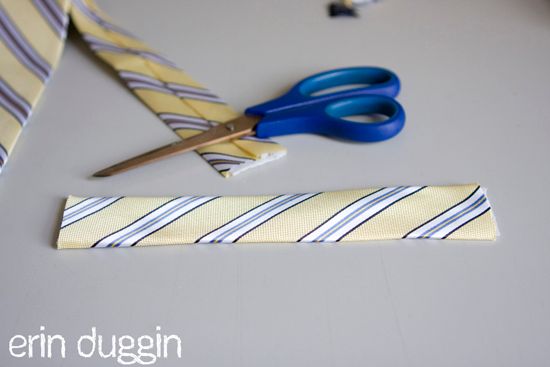
1) Buy a men's tie you like. Please refrain from buying a psychedelic one or one with cartoon characters on it because well...they are ugly.

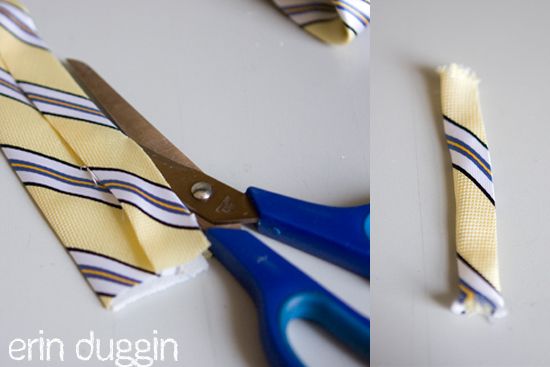
2) Cut a strip from the skinny side of the tie about 8 inches long.
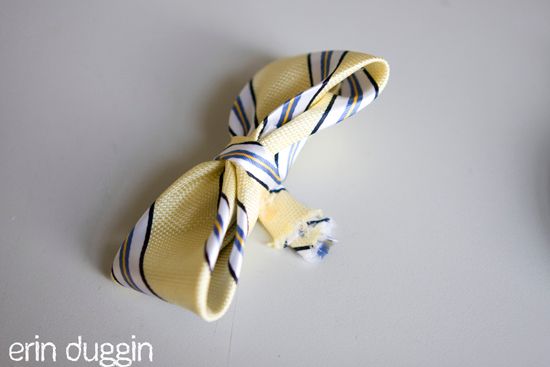
3) Fold the piece in half with the back side (the side with the seam) facing out. Dust off the old sewing machine and sew together the two edges to create a loop.
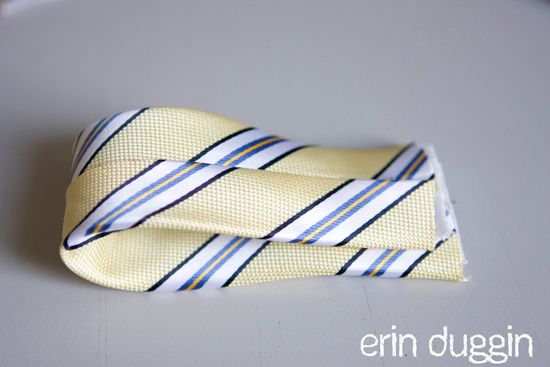
4) Turn the loop right side out so the sewed seam is now on the inside.
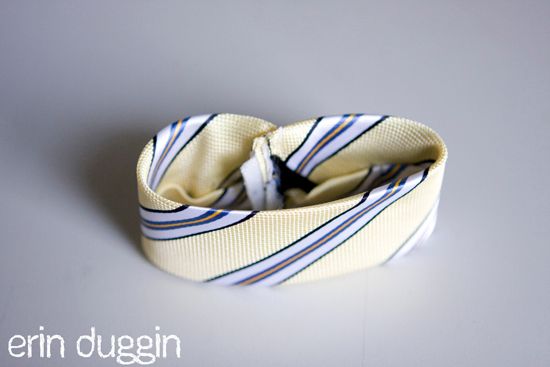
5) Cute a small strip a few inches long from the back of the neck tie.
6) Turn the small strip inside out and sew the edges together. Then turn the fabric right side out. This isn't easy, use a pencil or scissors to help you turn it right side out. Then hand sew the loop in the middle to make the bow tie. Make sure it is tight enough.
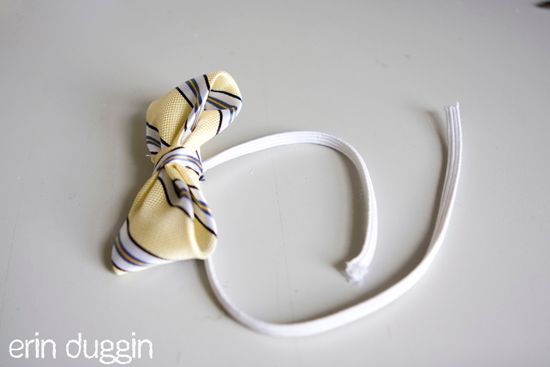
7) Measure your little man's neck to see how much elastic to use. Then slide the elastic through the small loop and sew the edges together.
8) And finally, put it on your little man.

Doesn't Tate look dashing in his new bow tie? He did get a little cocky though. I peed my pants a little bit when I edited the pics and found this shot...

"Heelllloooo there. Yes, I'm kind of a big deal. I have many leather bound books."
Anyways, that's how you can make a baby bow tie from a regular necktie. Here are some similar tutorials for other ways to do it
Here and
HERE.
O.K., now I really do have to go clean. Have a good weekend!